Tomorrow I am giving a presentation as part of the Thinking Globally, Delivering Locally VC Seminars being jointly conducted by the Macquarie ICT Innovations Centre at Macquarie University and the New South Wales Department of Education and Training.
As they point out on their web site the Macquarie ICT Innovations Centre is hosting the seminars to provide regional and isolated schools with access to innovative technologies. I received an invitation from Anne-Maree Moore, Project Manager Collaborative Technologies at the centre to participate in the Thinking Globally seminars.
The focus of my presentation is Getting Started with Web 2.0 Technologies. During the course of the presentation regarding classroom implementation of Web 2.0 technologies I plan to emphasise three points.
1. Choose an aspect of the curriculum with which you hold a passion.
2. Choose an online tool with which you feel comfortable or ‘clicks’ for you.
3. Steer a simple, straightforward path at the outset.
As well, timing is also important… For example I find term III is favourable moment when the pressure is off somewhat. No final exams and no reports to write. [Actually these ideas apply to any technology based curriculum integration, not just Web 2.0 technologies. Some of my ideas are available in this document containing notes, ideas and some brainstorms.]
Why do I give this advice? By following these simple rules of thumb a teacher new to technology will be able to ease themselves into the process gently. Being familiar with the curriculum component enables the teacher to focus on the implementation and the technology. Selecting a technology that they are comfortable with serves to ease the burden with the actual implementation. A simple beginning provides a a practical and commonsensical framework for the implementation to be effected.
I base this on experience, pure and simple. It may not have been Web 2.0 but back in 1992-1993 the tool that clicked for me was Apple’s HyperCard. I was given a quick demo of HyperCard by Dr John Hedberg, during a promotional presentation for a new course being offered by the University of Wollongong. John was teaching at the Faculty of Education at the university and he was a member of the famous Interactive Multimedia Learning Laboratory, now EmLab. John is now Professor and Head of the School of Education at Macquarie University.
John’s demo of HyperCard in addition to the other components of the presentation convinced me to enrol in the Graduate Certificate of History Education at the UOW. In addition to the pedagogical components the course included a technology subject that introduced the students to multimedia programming and educational technologies. It was brilliant. It changed my life.
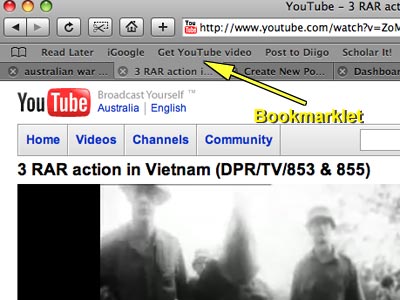
I chose an area of the curriculum that held my passion. The Pacific War. In particular the unit on Australian prisoners of war. My late father, Francis Xavier Larkin Snr, had been a guest of the Imperial Japanese Army (IJA) across various parts of Asia from January 1942 through to August 1945. My father had shared with me his letters, photographs, relics, maps and other documents from that period. This was an area that fascinated me, personally and professionally. I created a curriculum matrix at the time.
I scanned the documents using an Apple Scanner, a Mac Classic and a HyperCard stack that acted as the interface. I created a HyperCard stack that incorporated the documents and my father’s recollections that I had recorded on to cassette tape and then later digitised on the Mac. I bought a Mac LCIII.
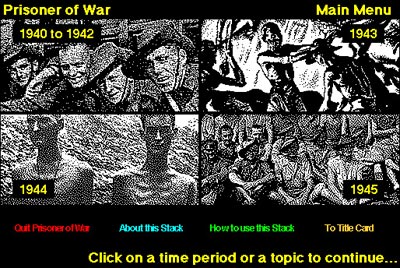
Main menu of the Prisoner of War HyperCard stack.
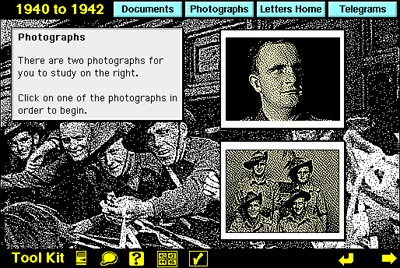
Entry point for Photographs 1940 to 1942.
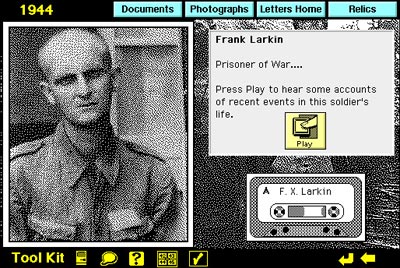
Photograph of my father taken in 1944 by the IJA. Clicking on the play button allowed the listener to hear my father’s thoughts regarding the photograph.
HyperCard was an excellent tool. It introduced programming to the masses. Once I had figured out the navigation and the ‘stack map’ developing the stack, card by card, was straightforward. It was an enjoyable process and provided myself with a real sense of achievement. When it was completed I placed it on a server at school with the help of two colleagues, Ken Orrock and David Emery.
My Year Nine students could access it to complete a number of activities. They were amused by the fact that they were attending History lessons in the computer laboratory. During subsequent years I wore a second hat at school and taught students how to create HyperCard stacks as part of their Design and Technology course. I made other stacks on Kite Flying, the Iceman and a simple game about the end of the world called Hunger City. That stack taught students about the importance of collecting appropriate evidence when creating a historical argument.
I actually racked my brain repeatedly for a topic that I could use as the foundation for my first HyperCard stack. Various topics crossed my mind. One evening when I was going through my father’s relics it dawned on me. My father’s wartime experiences were the perfect topic. I had an interest in the topic and by scanning the letters, relics and photographs and by creating the stack I was able to share the relics with the students without fear that the original relics would be lost or damaged. The students could access the materials on the server via the stack. It was a great solution. I have since created a web site that feature my father’s relics.
So, my journey into educational technology began with a topic for which I had a passion, a piece of technology that clicked and a reasonably straightforward beginning. It was a good experience. I enjoyed it. The students enjoyed it. It reinvigorated my passion for education. I had reached a point in my career where I was basically teaching within a reasonably secure comfort zone. That HyperCard stack took me outside my comfort zone and set me on a journey that continues to this day.
Well, time has passed and not long back I wished to set up some blogs for my middle secondary History students. What steps did I take?
First of all I did some investigation. I began with a simple Teacher~Class blog in which problems and questions were posed by myself and the students responded via comments. I utilised Blogger as the tool. I would utilise eduBlogs now.
Actually, thinking back I had a blog of my own for a while before creating a teacher-class blog. By working with my own blog I gradually understood how they worked. I gained an understanding of the positive characteristics of the blog and also the pitfalls.
Then, how about blogs for each student? This was a significant task. I considered some of the educational blogging services but discovered, for example, that once I had exceeded 50 student blogs, that fees kicked in for the school. In other cases there was a lack of control. How could one set up multiple student blogs? Well this is how I did it. This time.
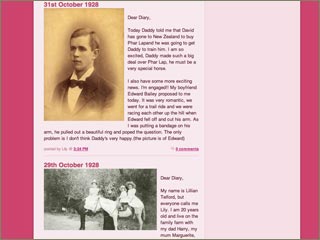
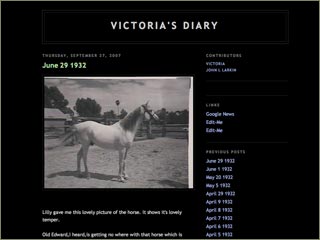
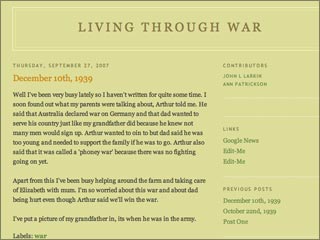
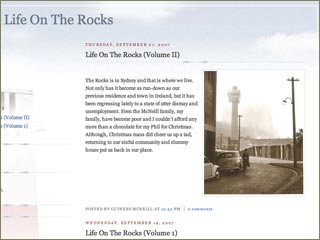
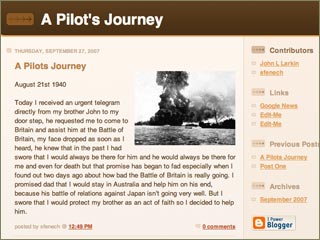
I wanted my middle secondary students to compose online diaries as if they were living through the Great Depression and/or the Second World War. I explored some blogging possibilities and I went with Blogger. I set up the Blogger accounts for each student. That took up some time. I created a simple initial welcome post in each blog.
I created a sample blog that illustrated the sort of product that I would like to see the students begin with as they started blogging. I was then hoping that they would become more creative as they proceeded with the blog. The next day in class I asked the students to list their student email accounts in turn in a spreadsheet. I showed them the sample blog and how they would need to post a blog entry. I invited each student to pick a template for their blog as well. I invited each student to be an author of their blog. I would be the administrator.
The following day I had booked the students (two separate classes) into two separate computer labs at school to begin blogging. There were some technical problems but all of that was sorted and a subsequent visit was more fruitful. The holidays then intervened. I was away as well and now that the fourth term has commenced I shall encourage the students to start blogging again. I have a role to play there.
I am notified of each blog post via a RSS newsreader. Comments will come to me via email for vetting. Just for now I just wish to see the students enjoying the process of creatively writing via a different medium. They understand why I have set up these safeguards. The students began their blogging with mixed results and about a dozen have really sunk their teeth into the project. many of the students have only made one post. Squeezing this project within the normal programming of the subject is challenging but I am getting there, gradually. I have added some screen shots below.
From a historical perspective it is interesting as the blog entries are sprinkled with dating errors, anachronisms and other anomalies. They provide a source of fruitful analysis when the students share their blogs in class.
For tomorrow’s presentation I shall point the participants to the following resources…
Web 2.0 links and resources: Here you will find online guides and resources for applications and tools as diverse as Twitter, Second Life, Wikis and more. There are links to classroom blogs, wikis, Second Life sites, teacher blogs and a variety of advice from educators near and far. I have just updated the list with additional Nings and Twitter resources.
How to guides. This page is chock-a-block full of pdf guides to blogs, wikis, Twitter, RSS feeds, Posterous and much more. Feel free to download and use these guides. Worpdress has just been updated so that guide is a little out of date. I have also added these resources to my home page.
Blogrolls. These are some of the blogs that I read some of the time, not all of the time. This needs updating. Need to import my latest OPML file into Google Reader.
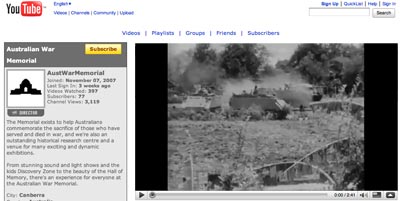
I have also uploaded four rough edits of an interview recorded by Nanyang Technological University. Four questions were answered.
Click on each question to view the relevant video. You will need to ensure you have Quicktime installed.
What is Web 2.0?
How can teachers and students exploit Web 2.0 technologies for teaching and learning?
How can teachers benefit from web 2.0 technologies?
How can students benefit from web 2.0 technologies?
A number of useful tools:
WordPress blog: hosted by WordPress | hosted by yourself
Flickr
Creative Commons
Compfight
Posterous
Twitter
Remember, before embarking on a dedicated implementation of technology as part of your curriculum consider your existing workload and the demands that are made upon your time on a daily basis. Some time is required to make changes to your programming and the strategies that you employ in your teaching. Allowing for this time should not be a burden.
Choose a part of the curriculum which holds a particular interest for you. Select a technology that clicks for you. Do not re-invent the wheel. If other colleagues or teachers elsewhere have also established similar implementations within the curriculum then drop them a line and seek their advice or assistance. Perhaps you could collaborate. Take small steps, one after the other. A simple, straightforward path. Nothing too extravagant or burdensome.
And something I have neglected… tap into the skills of your students. Allow the students to assist as appropriate. Empower the students.
The journey should be pleasant. An opportunity or professional growth. An opportunity to stretch. An opportunity to be observed in a different light by your peers and your students.
What steps have you taken in the past? What steps will you take in the future? Please share them below if you wish by adding a comment.
[This post was created via an amalgamation of earlier posts, the inclusion of new material and republished for the benefit of participants in tomorrow's presentation.]